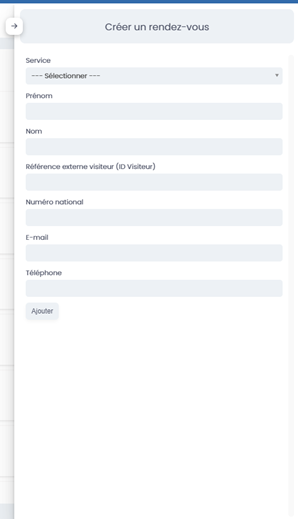
Create an appointment
1. Create an appointment.
To create an appointment, click the "create an appointment" button in the top right.

A window will open, fill in the different fields and add the appointment.
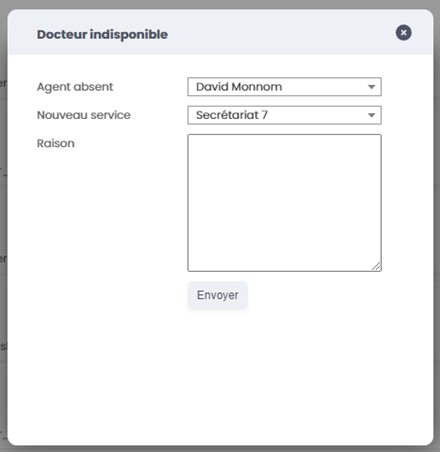
2. Declare an agent as unavailable
To declare an agent unavailable, click the "Agent unavailable" button.

A window will open, indicate the agent who is absent and then assign a new service to redirect the tickets.
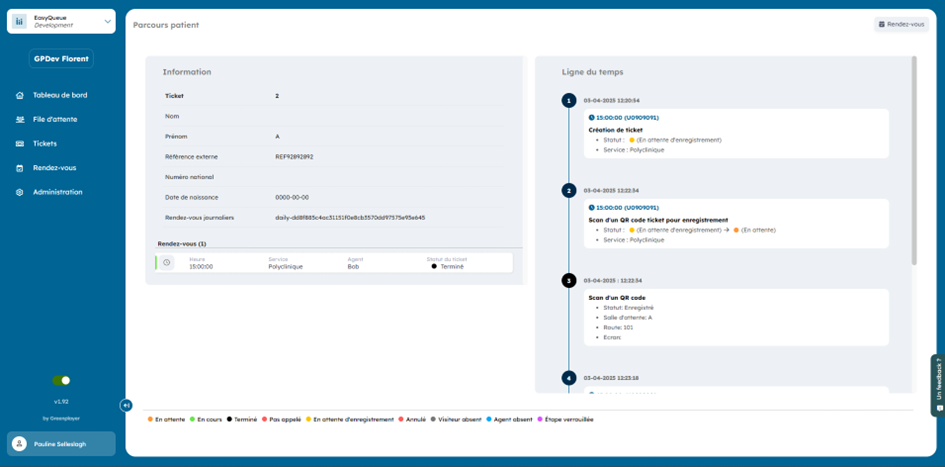
3. Information about a visitor's appointments
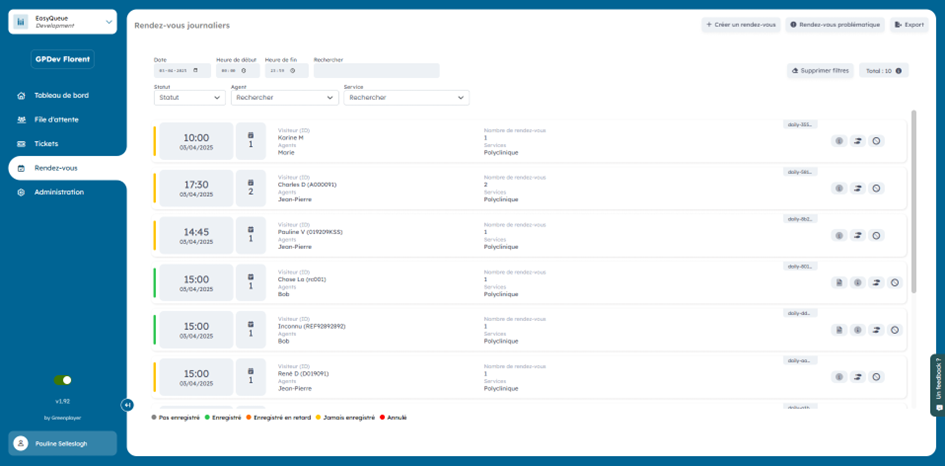
3.1 Display the day's appointments
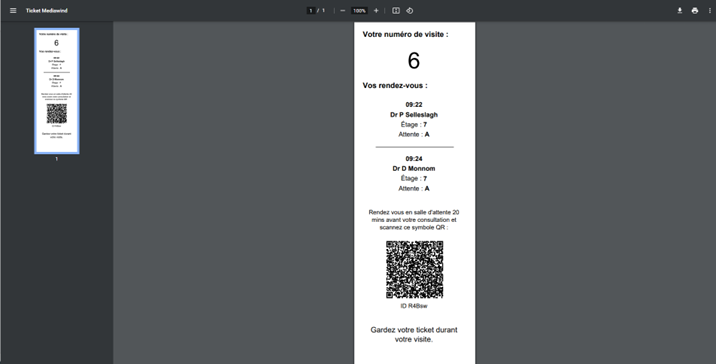
4. Export to .PDF.
To export your ticket to PDF format, click the "PDF" icon. The ticket will open in a new tab and you will be able to print it.

5. Register one or more appointments
To register an appointment, click the "appointment" icon.

You can register a single appointment for the visitor:

You can register all of the visitor's appointments:

6. Cancel one or more appointments
To cancel an appointment, click the "delete" icon on the right:
![]()
To cancel all appointments of a visitor, click the "cancel" icon on the right:
![]()
7. Filters
Different filters are available to help you find an appointment more easily.

8. View the history of an appointment
You can view the history of an appointment by clicking this icon: