Manage queues
Queue management takes place in the "Queue" tab. This tab provides an overview of the different desks and allows you to connect to them.
1. The list of desks
If the agent is not attached to an event in a specific office, there will be a view of the different desks and their availability as well as some essential information (such as: the desk name, the name of the agent occupying the desk, the service they are attached to, a PMR indicator, and more).
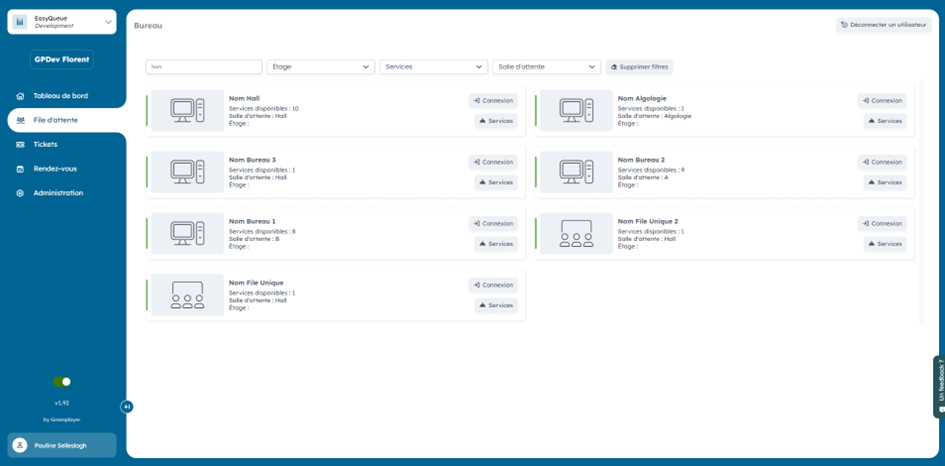
2. Connect to a desk
2.1. Automatic connection to a desk
If your agent is attached to an event, you will be directly connected to the correct desk.

2.2. Manual connection to a desk
If the agent is not attached to an event, they can select the desk of their choice by clicking the "connect" button.

If the desk is already occupied, they cannot connect to it.
3. The interface of a desk
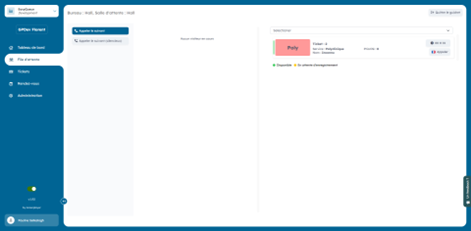
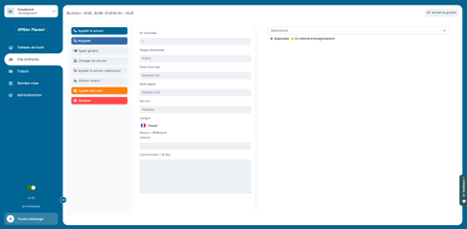
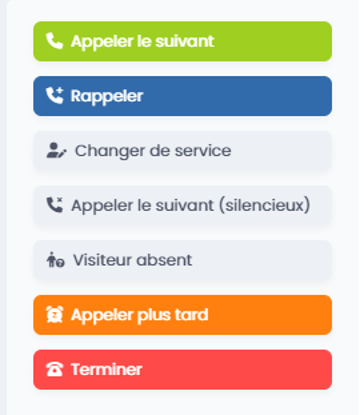
3.1 The different buttons
Several buttons with different features are available on a desk interface. These vary depending on the status of the desk (whether it is in maintenance or not).
- Before calling a visitor (outside maintenance)

A. Call next
- Functionality: This button calls the next visitor in your list with a sound alert on the screens dedicated to ticketing.
- Impact on the visitor: The visitor's ticket number will be called on the screens intended for this purpose. You will enter a consultation with the called visitor.
B. Call next (silent)
- Functionality: This button calls the next visitor in your list without a sound alert and without display on the screens dedicated to ticketing.
- Impact on the visitor: Nothing happens on the call screens. This button can be used to call the patient without showing anything on screen.
- During a consultation with a visitor
A. Call next
- Functionality: This button calls the next visitor in your list with a sound alert on the screens dedicated to ticketing.
- Impact on the visitor: The visitor's ticket number will be called on the screens intended for this purpose. You will enter a consultation with the called visitor.
B. Call next (silent)
- Functionality: This button calls the next visitor in your list without a sound alert and without display on the screens dedicated to ticketing.
- Impact on the visitor: Nothing happens on the call screens. This button can be used to call the patient without showing anything on screen.
C. Recall
- Functionality: This button lets you recall the visitor if they still haven't shown up for the consultation on the screens dedicated to ticketing.
- Impact on the visitor: The visitor's ticket number will be recalled on the screens intended for this purpose while you remain in consultation with them in the QMS.
D. General call
- Functionality: This button calls the visitor's ticket number on all screens (waiting rooms, desks, etc.). Use this button with caution.
- Impact on the visitor: The patient's number will be called on all screens in the clinic.
E. Change service
- Functionality: This button sends the visitor to another service.
- Impact on the visitor: The consultation will be closed and the ticket number will appear on the reception screen you transferred them to.
F. Visitor absent
- Functionality: This button marks the visitor as absent.
- Impact on the visitor: The visitor is then removed. Their ticket number will disappear from the screens.
G. Call later
- Functionality: This button puts the visitor back in the queue so they can be called later.
- Impact on the visitor: The consultation will be closed and the visitor's ticket will be put back into the waiting list so they can be called later.
H. Finish
- Functionality: This button closes the consultation.
- Impact on the visitor: The ticket number disappears from the call screens and the consultation is closed without calling the next visitor.